Drywall repair entails loads of steps. In areas with a lot of dents and holes, like in the mudroom the place boots, hockey sticks and golf club bags go away their marks, don’t try to fill each dent individually. Mildew also immediately started to be visible on the drywall inside just a few days. They require only basic tools and some drywall joint compound Even be ready to the touch up or paint the repaired space.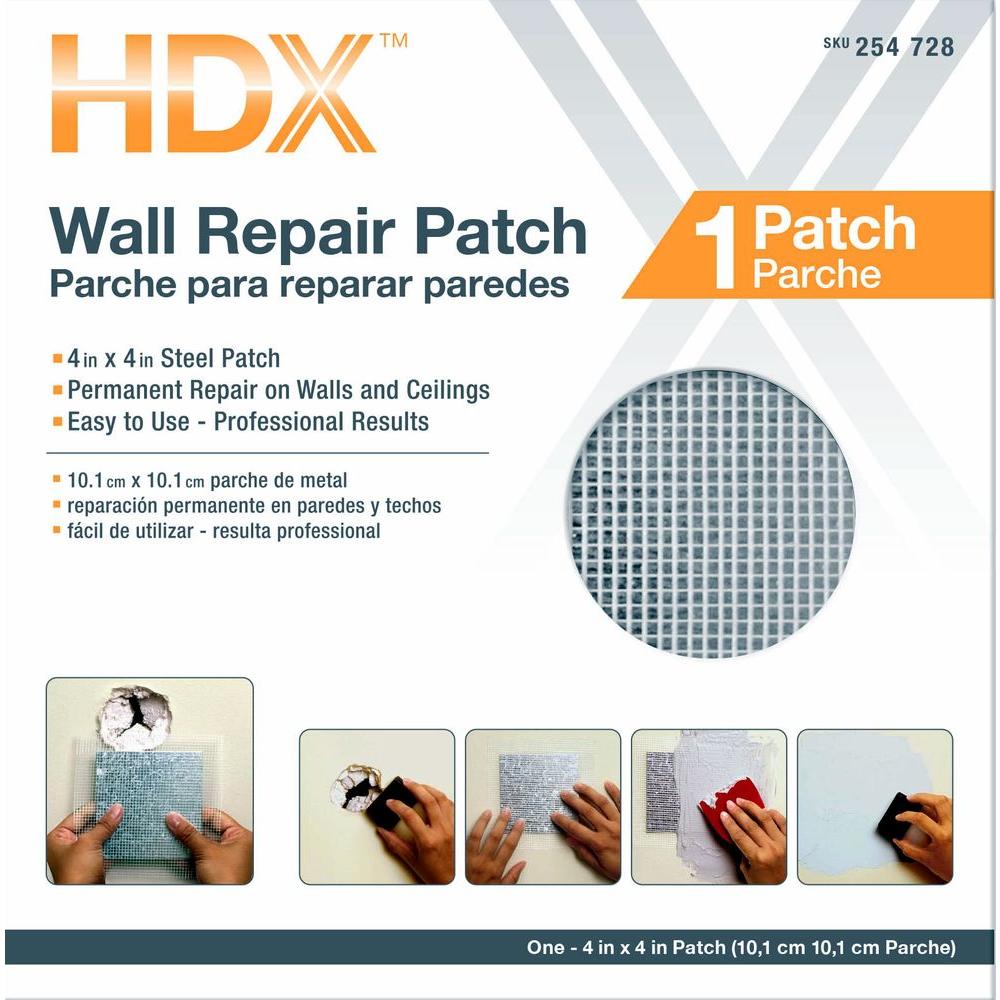
Allow the joint compound to dry fully then flippantly sand the world (image three). Wipe away the dust then paint over it. Reduce a bit of drywall right into a square a bit of bit bigger than the outlet. Along with the patch, you want drywall patching compound to easy out the patch and a putty knife to spread the drywall compound over the patch. When a crack appears, it is usually on a seam where two drywall sheets meet, and it’s simply mounted.
Set up wooden cleats in opposition to the studs on both sides of the opening to assist the brand new drywall’s vertical edges (image 1). Use scrap wooden equivalent to 1×2 furring for smaller repairs; if you are replacing a big sheet of drywall, reinforce the opening with 2×3 lumber. Fit the gypsum into the new hole and press the paper edges coated with joint compound into place along the skin fringe of the hole.
Insert the drywall patch in the gap, and screw it to the cleats utilizing drywall screws. One of the best ways to connect the replacement piece will rely upon its measurement and whether or not there are wall studs backing it. Once the alternative piece is securely mounted, mixing in the floor so the repair just isn’t noticeable usually requires three functions of drywall joint compound.
When making use of the compound, maintain the knife at a 70-diploma angle and swipe across the crack. If there aren’t any electrical or plumbing traces present, use a drywall noticed to punch a gap by means of the drywall alongside your line. Then there are two ways to repair nail pops: use a screwdriver or hammer to drive the nail again into the studs (picture 1), then bracket every nail head with carefully spaced drywall screws (image 2); or, remove the nail and drive a screw in its place, along with a second screw close by, to re-secure the drywall to the stud.